


 nude
basecoat
bad decal
nude
basecoat
bad decal
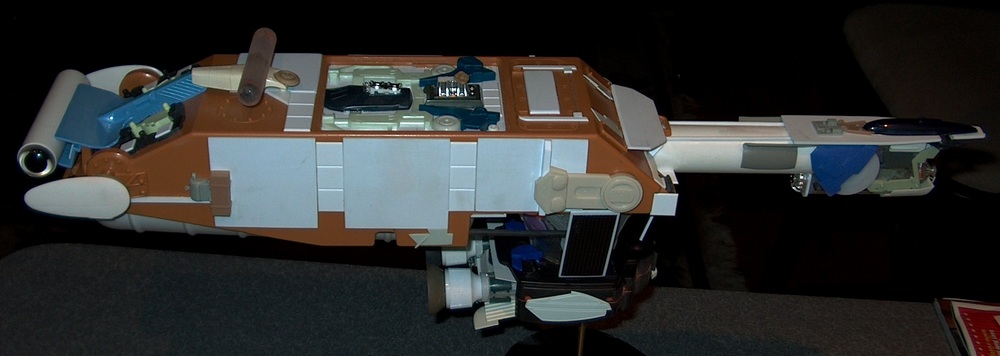
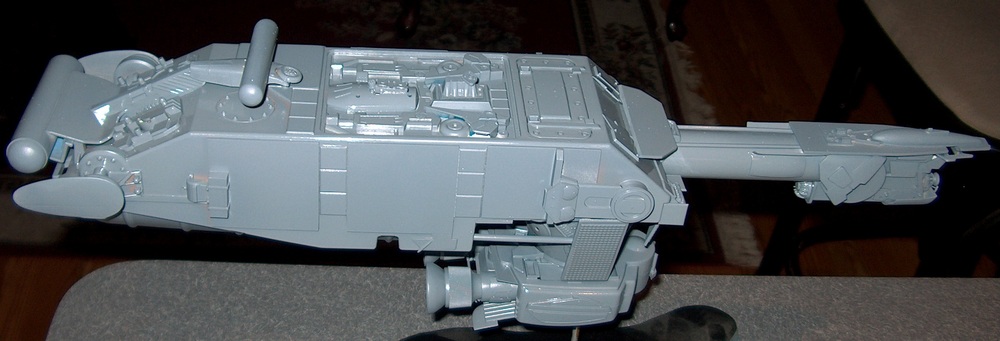
I bought several boxes of miscellaneous parts at an estate sale. Among the parts were the vacuformed shapes I used in the Rag-Tag Lander, and a similar ribbed shape that seemed to fit perfectly inside a GI Joe Tank hull. The resulting shape needed something to keep it from looking like a box with one curved side. At this point the directions the design could go are box-neck-engine, like the Skrzynka and the Texas, or fat body/engine-neck-head, like the FC342 and the Seeschildkroete.
For this one I went with the latter, but with a difference. Since the ribbed shape did not extend the length of the box, for novelty's sake I plated-over the leftover and made the engines a module hanging down below the body. At this point I could have integrated the head and body but, lacking any immediately suitable head candidates, I deferred the decision and glued-on a neck. After that it was all catch-up.
Since I really hate puttying I elected raised panels on the side to cover the casting-dents. The tank-support shape on the back just seemed to fit. In it a horizontal tank also just seemed to fit, inspired by the similar shape on the back of some modern tanks. But, the mount then lacked any integration with the rest of the ship, so I added the bugatti to the top with yet another horizontal tank - Aren't two shapes like that better than one?
The disposable styrene cup that leads down to the engine is an awkward shape to cover, so I threw tiny snowspeeders on it. Too recognizable? Let's hide them beneath huge baffles/radiators supported by computer keyboard keys. They also partially bulked-out the engine mount, while simultaneously keeping it smaller than the engines. All that was fun, but I really had to deal with that neck-end.
A head too big makes the neck look fragile (except, of course, to Star Trek modellers). So I did the modelling equivalent of closing my eyes and just choosing some parts so that I could move on. Which pretty-much finished the construction.
Judging by how many green ships I have this year, obviously I was very tempted to paint this one green, too. Instead I saved the green for some space-occupying chunks and went with an orange body. And I made the green large enough to enclose the decals, unlike with the Lander. Good thing I did, too, as the custom-made decals, naturally misted with Testor's Clear Flat [Lacquer] reacted poorly to the Krylon Clear Flat [Enamel] with which I oversprayed the ship as a final step. The only thing left to do was sand-off the decals and replace them with... What? That was the last of my large "alien writing"!
Desperate, I broke out the do-it-yourself rub-on decal kit I got Christmas before last. At the time it sounded easy enough to use - Until I started following the instructions. But, Google is your friend. I found someone whose experience was alarmingly mixed, but who took some good pictures. My experience was equally mixed. In my case, following instructions, I couldn't get the rub-on letters to rub-on. They preferred sticking to the clear carrier rather than transferring to the ship. It was enough to make me miss Woody Vondracek's perfect dry transfers. New markngs over repainted green panels, a little [over] weathering, and... Good as new. Or very-used.